Key takeaways
- Look for signs like visible mold, musty odors, and unexplained health symptoms.
- Safely remove mold from air ducts using easy-to-find tools and supplies.
- If mold growth is extensive or health risks are present, professional help may be necessary.
Mold in air ducts is more common than you’d think. It’s one of those quiet problems that can cause big issues if left unchecked.
And let’s be honest, nobody wants to deal with the consequences of breathing in moldy air.
Mold can lead to all sorts of health problems, from allergies to more serious respiratory issues.
It’s not just about the air quality either. Mold can slowly damage your home, making it a problem that needs addressing sooner rather than later.
This guide is here to help. The steps are clear, practical, and designed so anyone can follow them. So, if you’re up for cleaner air and a healthier home, keep reading.
Tackling mold in air ducts doesn’t have to be complicated, and this guide will show exactly how to do it.
Do you have mold in your air ducts?

Mold in air ducts can be sneaky. It’s not always obvious, but there are a few telltale signs that give it away.
First, take a look at the vents.
If you see mold around them, that’s a clear sign. But mold doesn’t always show up where it’s easy to see.
Sometimes, a musty odor is the only hint that something’s not right. If the house suddenly smells like a damp basement, it’s worth investigating further.
Health is another big clue.
Unexplained allergies, coughing, or even headaches can all be linked to mold in the air.
If these symptoms stick around, it might not just be the season—it could be the air quality.
Not sure if it’s mold? Here’s how to check.
Grab a flashlight and take a closer look inside the vents.
No need to go deep. Just a quick peek can tell you a lot. Look for any black, green, or even white spots that seem out of place.
It’s easy to miss these signs, especially since air ducts are often out of sight, out of mind.
How to get rid of mold in air ducts: 7 easy steps
Cleaning mold from air ducts might sound intimidating, but simple steps make it manageable.
Whether you’re handy or just looking to save on a service call, these seven steps will guide you through the process.
With the right tools and a bit of time, you can handle this task and keep your air safe and clean.
Step 1 – gather your tools and safety gear
Before you start, make sure all the necessary tools and safety gear are at hand.
You’ll need a good mask, gloves, and protective eyewear—mold isn’t something to inhale or touch directly.
Have a screwdriver ready to remove the vent covers. You’ll also need a flashlight to inspect those hard-to-see spots and cleaning supplies like a mold-specific cleaner.
Safety is key here.
Protecting yourself from mold exposure is the first priority.
Taking the time to gather everything makes the job go smoothly and safely.
Once everything’s in place, you’re ready to move on to the next step.
Step 2 – turn off your HVAC system
Before cleaning, make sure to turn off the HVAC system. This stops mold spores from circulating through the house while you’re working.
Start by switching off the system at the thermostat. Then, cut the power at the circuit breaker to be extra safe.
You’re not just cleaning—you have to do it right and safely.
Making sure the system is fully powered down will keep the spores contained and make the cleaning process much more effective.
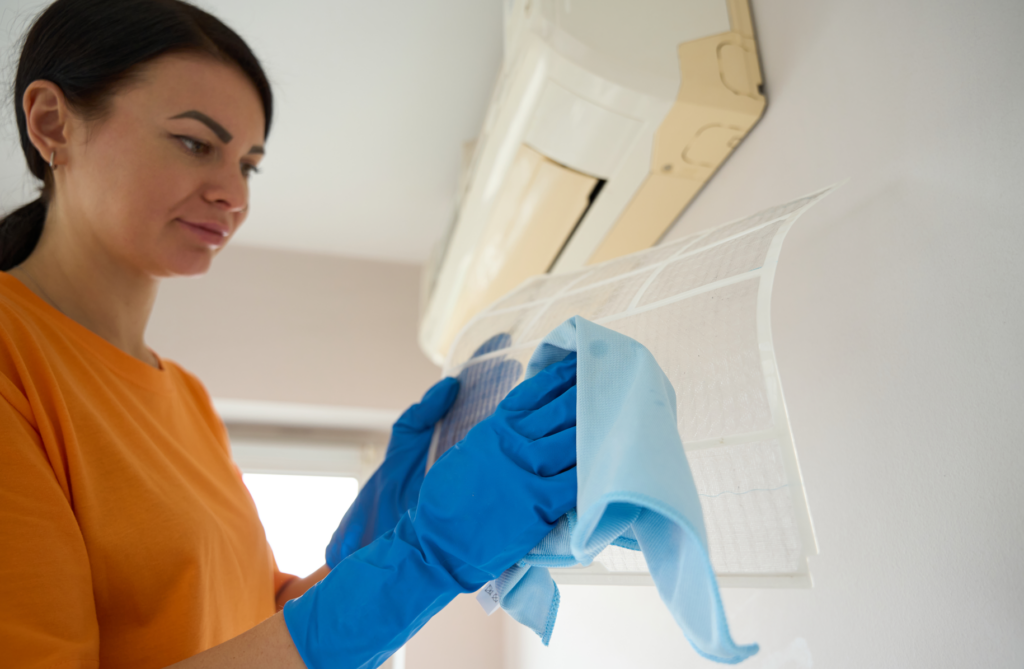
Step 3 – remove and clean the vent covers
Start by carefully removing the vent covers. Use a screwdriver to take them off without causing any damage.
Once they’re off, it’s time to give them a good cleaning. Soap and water work well. For tougher spots, use a mold-specific cleaner.
After scrubbing them down, let the vent covers dry completely before putting them back.
You wouldn’t want to reintroduce moisture into the system again, which could lead to more mold growth.
Step 4 – inspect and clean the air ducts
With the vent covers off, it’s time to inspect and clean the air ducts. Use a flashlight to look deep inside the ducts, checking for visible mold spots.
A vacuum with a HEPA filter or a long, flexible brush can help you reach and clean these areas effectively. Take your time here.
The goal is to clean out as much mold as you can without spreading spores.
If you spot heavy mold growth or it’s hard to reach, consider using a specialized cleaner or even calling in a professional.
Step 5 – apply a mold inhibitor
Now that the ducts are clean, it’s a good idea to apply a mold inhibitor. Pick an EPA-approved product that’s safe for use in air ducts.
Apply it evenly throughout the ducts, focusing on areas where mold was present or where moisture tends to accumulate.
This step helps stop future mold growth, keeping the air in your home cleaner and healthier.
You’ve done the hard work. Now, let’s make sure it doesn’t come back.
Step 6 – replace the air filter
A clean air filter is important for maintaining good air quality and preventing mold from returning. If you haven’t replaced the filter in a while, now’s the perfect time.
Choose a filter that fits your system and has a good MERV rating to catch small particles. Replacing the filter is quick and easy but makes a big difference.
When did you last change yours? It’s easier than you think and keeps the air clean.
Step 7 – turn the HVAC system back on and monitor
After everything’s been cleaned and put back in place, it’s time to turn the HVAC system back on.
But before that, take a moment to double-check your work. Make sure everything is dry, secure, and ready to go.
Once the system is running again, keep an eye on it. Monitor for any signs of mold returning, such as musty odors or visible spots around the vents.
Regular checks will keep the ducts clean and the air quality remains high.
When to call in professional help
While a DIY approach can handle minor mold issues in air ducts, there are times when it’s better to bring in the professionals.
If the mold growth is extensive, recurring, or located in areas that are difficult to reach, DIY might not be enough.
Professionals make sure that the problem is fully addressed, reducing the chances of it coming back.
Health is another important factor. If anyone in the household has severe allergies, asthma, or other respiratory conditions, dealing with mold on your own could be risky.
Mold spores can worsen these conditions, and a professional can handle it safely.
There’s also the matter of cost versus safety. While hiring a professional might seem like an added expense, it’s often worth the investment.
A professional can clean thoroughly and offer solutions that go beyond surface-level fixes. In the end, the peace of mind knowing the job was done right is invaluable.
When in doubt, it’s better to be safe than sorry.
If the situation feels out of control or poses health risks, call in the experts.
They have the tools, experience, and knowledge to handle mold effectively for a healthier and safer home.
Breathe easier in your own home
Taking control of your home’s air quality doesn’t have to be complicated.
By following these steps, you’ve tackled a common issue that can have a big impact on your health and comfort.
It’s good to know that with the right tools and a bit of effort, you can keep your home clean and safe.
You’ve learned how to get rid of mold in air ducts—a task that might have seemed tough at first.
Now, you can enjoy the peace of mind with a cleaner, healthier home.
With regular monitoring and a few preventive measures, you can keep your air fresh and safe.
So here’s to breathing easier, knowing that you’ve taken an important step in maintaining your home’s air quality.